Affiliate Disclosure:This article contains affiliate links. If you purchase through our links, we may earn a small commission at no extra cost to you. We only recommend gear we've tested or would genuinely use ourselves.
how to • May 13, 2026 • 12 min read · The Bite Intel Team
Kayak Fishing Setup for Beginners: Gear Priorities, Budget Guide, and Full Checklist
Complete kayak fishing setup guide for beginners. What gear to buy first, how much to spend, and a full checklist of everything you need before your first trip.
You bought the kayak. Maybe it was an impulse buy, maybe you researched it for months. Either way, it's now sitting in your garage, and you have no idea what comes next.
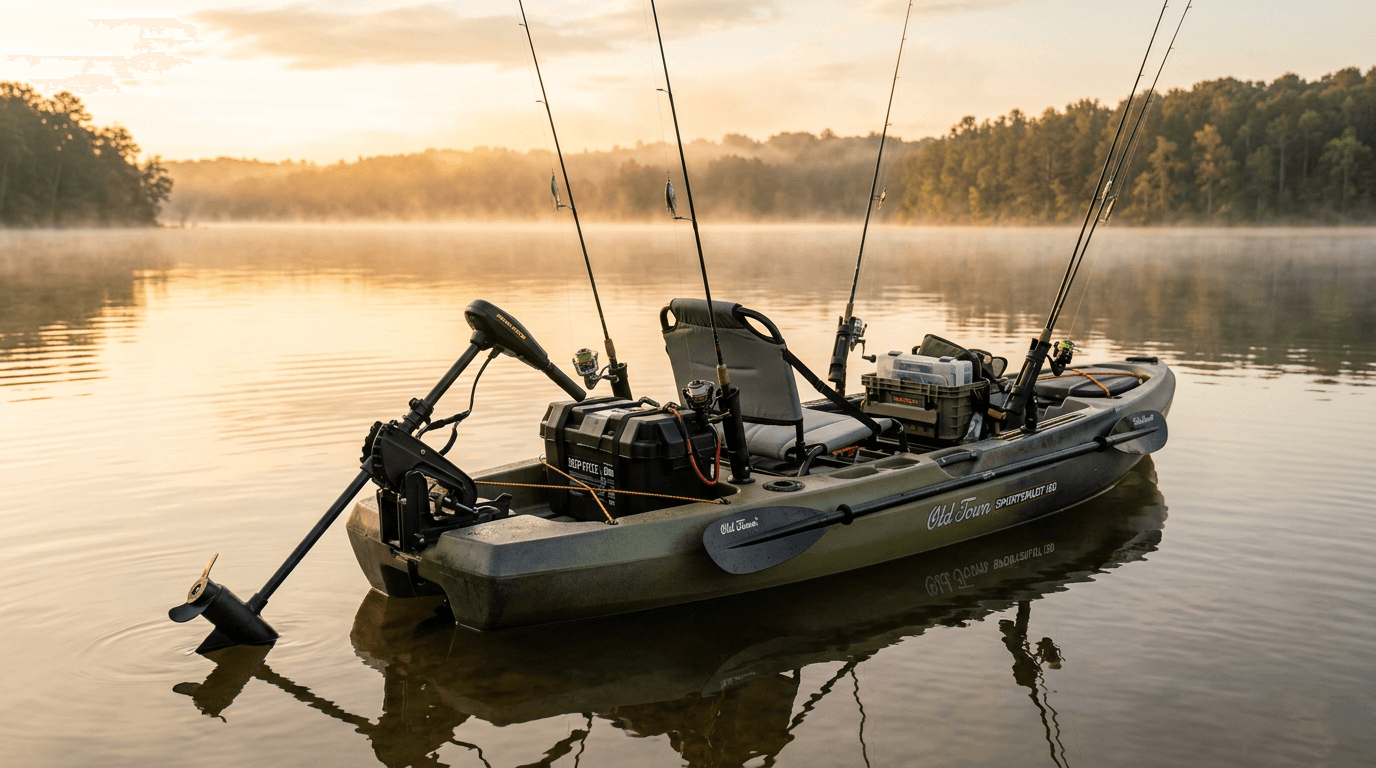
You've seen setups online — rod holders everywhere, fish finders mounted, outriggers deployed, gear crates loaded — and it looks overwhelming. It also looks expensive. You start wondering if you need all of that before you can even fish.
You don't. This guide cuts through the noise and tells you exactly what to buy, in what order, and how much to spend. We'll separate the must-haves from the nice-to-haves and give you a realistic budget at every tier so you can get fishing without wasting money on gear you don't need yet.
The Core Principle: Safety First, Comfort Second, Efficiency Third
Before we get into product lists, here's the framework for how to prioritize your spending:
Priority 1 — Safety gear: If it can save your life or keep you legal, buy it first. PFD, whistle, and navigation lights if you fish dawn or dusk.
Priority 2 — Comfort gear: Gear that keeps you on the water longer. Seat upgrade, proper paddle. A bad seat ends trips early. A great seat means 3 hours becomes 8.
Priority 3 — Fishing efficiency gear: Rod holders, anchor system, crate, nets. These make you more effective once you're comfortable out there.
Priority 4 — Upgrades and luxury: Fish finders, outriggers, trolling motors, premium accessories. Add these once you know how you actually fish.
Most beginners get this backwards — they buy the fish finder before they've figured out how to anchor, then they're hunching over a screen on a seat that's giving them back pain. Build the foundation first.
Essential vs. Optional Gear: First Season vs. Later
Must-Have (First Trip)
| Item | Why It's Essential | Budget |
|---|---|---|
| PFD (Type III fishing) | Legal requirement; saves your life | $50–$120 |
| Whistle | Required signaling device | $5–$10 |
| Rod holder (2 min.) | Hands free for paddling | $20–$60 |
| Paddle | You need to move | $60–$150 |
| Dry bag | Protects phone, wallet, keys | $15–$40 |
Should Add First Season
| Item | Why It's Worth It | Budget |
|---|---|---|
| Anchor + trolley | Stops drift, makes you 10x more effective | $50–$120 |
| Gear crate | Organizes tackle, holds rods | $25–$90 |
| Seat upgrade | Extends comfortable fishing time | $60–$200 |
| Landing net | Required for actually landing fish | $30–$80 |
| Navigation lights | Required at dawn/dusk | $20–$60 |
Optional (Add When Ready)
| Item | When to Add It | Budget |
|---|---|---|
| Fish finder | After you understand your water | $150–$500+ |
| Outriggers | If you want to stand or fish choppy water | $100–$300 |
| Trolling motor | For large lakes or strong current | $150–$600+ |
| GoPro / camera | If you want to document trips | $200–$400 |
| Upgraded paddle | When the entry-level one feels like a burden | $100–$300 |
Budget Guide: What to Spend at Each Tier
Tier 1 — $200 Budget: Get Fishing Now
This is the "buy the absolute minimum and get on the water" setup. It's not optimized. You'll be uncomfortable and less efficient than someone with a proper rig. But you'll be fishing, and that's better than waiting.
- Basic kayak rod holders (flush mount or clamp-on): $20–$30
- Type III fishing PFD (entry-level but USCG certified): $40–$60
- Plastic whistle (clip to PFD): $5
- 10L dry bag: $15–$20
- Folding grapnel anchor + 50ft rope: $20–$30
- Milk crate (hardware store) + zip ties: $8–$15
- Subtotal: ~$110–$160 (leaves room in budget for the paddle if yours is terrible)
What you're giving up at this tier: anchor trolley (you'll anchor from a fixed point, which is manageable on calm water), comfortable seat, navigation lights.
Tier 2 — $500 Budget: A Proper First-Season Setup
This is where most beginners should target. You're not just functional — you're actually comfortable and effective.
- Type III fishing PFD with pockets: $70–$100
- Anchor trolley kit (full system): $40–$70
- Folding grapnel anchor + rope: $25–$35
- Pre-built kayak fishing crate: $50–$90
- Seat upgrade (mid-range): $80–$120
- RAM-mount rod holders (2): $40–$60
- Rubberized landing net: $35–$60
- Kayak navigation lights: $25–$50
- 15L dry bag: $25–$40
- Subtotal: ~$390–$625
This setup handles 90% of kayak fishing situations. You can fish all day, land fish cleanly, hold your position, and stay safe. This is the rig to aim for.
Tier 3 — $1,000+ Budget: Start Strong, Upgrade Less
If you have the budget and know you're serious about this, spending more upfront means not re-buying things in 6 months. This tier adds quality and convenience without getting into fish finder / trolling motor territory.
- Premium fishing PFD (Onyx, NRS, Stohlquist): $100–$180
- Full anchor trolley + quality anchor: $80–$130
- YakAttack gear crate system: $100–$180
- Premium fishing seat (Surf to Summit, Skwoosh): $130–$220
- Fiberglass fishing paddle (Bending Branches): $100–$180
- Quality rod holders with gear track: $80–$150
- Fish finder (Garmin Striker 4, entry level): $150–$200
- Outriggers (optional, if you want to stand): $100–$250
- Subtotal: ~$840–$1,490
At this tier, you're building a rig that won't need significant reinvestment for years.
Gear Category Deep Dives
Rod Holders
Rod holders are the single most important fishing-specific upgrade. Without them, every rod you bring is a problem — it slides around, gets caught under your paddle, rolls overboard. With good rod holders, you can run 3–4 rods rigged and ready.
For beginners, RAM-mount clamp systems are the easiest starting point — they require no drilling and attach to any round rail or edge. If your kayak has gear tracks (many modern fishing kayaks do), get track-compatible holders.
For flush mounts, you'll drill holes in the hull. This sounds scary but is completely normal and safe when done with the right tools and marine sealant. The advantage is a cleaner, lower-profile result.
Full buying guide covering all types, mount positions, and how many you need: kayak rod holder buying guide.
Shop Rod Holders on AmazonAnchor System
At every skill level, one of the most common frustrations in kayak fishing is drift. You find a productive depth, a ledge, a weed edge — and then the wind pushes you off it. An anchor solves this.
The right way to anchor a kayak is with a trolley system — a rope-and-pulley setup that lets you slide the anchor attachment point from bow to stern. This lets you control your presentation angle relative to current and wind, and it's far safer than a fixed bow anchor (which can cause capsizing in moving water).
Read our full breakdown of the best trolley kits and how they install: best kayak anchor trolley kit.
Shop Anchor Trolley Systems on AmazonGear Crate and Storage
The rear tank well on most sit-on-top fishing kayaks is designed for a gear crate. A basic milk crate from the hardware store costs $8 and holds more than you'd think. Pre-built kayak crates add built-in rod holders, tackle bag attachments, and ruler strips.
Beyond the crate, you need dry storage for anything that can't get wet. Dry bags are cheap, waterproof, and float if you capsize.
For the crate setup: best kayak fishing crate and how to set up a kayak fishing crate.
For dry bags: kayak fishing dry bag buying guide.
Shop Kayak Fishing Crates on AmazonSeating
Sit-on-top kayaks come with a basic seat that's fine for 60 minutes. For 4–8 hour fishing sessions, you need real lumbar support, an adjustable backrest, and side pockets for frequently accessed items.
High-back kayak seats are the most popular upgrade. They sit elevated above the hull and give you a paddling position with better posture, less fatigue, and better leverage.
Full options and our picks: best kayak seat upgrades for fishing.
Shop Kayak Seat Upgrades on AmazonLanding Net
A kayak-specific net has a shorter handle (24–30 inches) with a deep rubberized basket. Magnetic net releases clip to your crate or PFD and release with one hand.
Detailed guide: kayak fishing net buying guide.
Shop Kayak Fishing Nets on AmazonNavigation Lights
If you fish before sunrise — and you should, that's when fish are most active — you're legally required to show lights. A white 360-degree light visible from 2 nautical miles satisfies the Coast Guard requirement for non-powered vessels under 7 meters.
Best options tested: best kayak fishing lights for night fishing.
Shop Kayak Navigation Lights on AmazonStability — When to Add Outriggers
Most fishing kayaks are stable enough for sitting-down casting. If you want to stand while fishing — a real advantage in shallow water — or if you're on open water with chop, outriggers are worth adding.
Our guide: best kayak outriggers for fishing.
Shop Kayak Outriggers on AmazonPaddle — Don't Cheap Out Twice
A mid-range fiberglass fishing paddle weighs noticeably less than aluminum and has a better blade shape for efficient paddling. Over 4–6 hours, that weight difference matters.
We reviewed one of the most popular mid-range fishing paddles: Bending Branches Angler Classic review.
Shop Kayak Fishing Paddles on AmazonHow to Prioritize Your Purchases
Week 1 (before your first trip):
- PFD — wear it every time
- Whistle — clip it to the PFD
- At least 2 rod holders
- Dry bag for phone and keys
Month 1: 5. Anchor + trolley 6. Gear crate 7. Navigation lights if you'll fish at dawn or dusk
Month 2–3: 8. Seat upgrade 9. Landing net
As budget allows: 10. Better paddle 11. Fish finder 12. Outriggers
Complete Beginner Gear Checklist
| Product | Price | Best For | Link |
|---|---|---|---|
| Type III Fishing PFD | $50–$180 | Safety — non-negotiable | Check Price |
| Plastic whistle | $5–$10 | Required signaling device | Check Price |
| Rod holders (2+) | $20–$80 | Hands-free paddling | Check Price |
| Kayak paddle | $60–$200 | Getting there | Check Price |
| Dry bag (10–20L) | $15–$50 | Protect phone and valuables | Check Price |
| Anchor + rope | $20–$50 | Holding position | Check Price |
| Anchor trolley system | $35–$80 | Safe anchoring + angle control | Check Price |
| Gear crate | $25–$90 | Tackle and gear organization | Check Price |
| Seat upgrade | $60–$220 | All-day comfort | Check Price |
| Landing net (rubberized) | $30–$80 | Clean fish landing | Check Price |
| Navigation lights | $20–$80 | Dawn/dusk legal compliance | Check Price |
| Fish finder (optional) | $150–$400 | Finding structure and depth | Check Price |
| Outriggers (optional) | $100–$300 | Standing, open water stability | Check Price |
Frequently Asked Questions
Q: How long does it take to rig a kayak for fishing?
A basic setup — adding rod holders, a crate, and an anchor system — takes 2–4 hours. Most of that is figuring out placement. A full setup with flush-mount rod holders requires a bit more time due to drilling, but most of it can be done in a weekend.
Q: Can I use any kayak for fishing, or do I need a dedicated fishing kayak?
Any kayak can be fished from, but a dedicated fishing kayak makes it much easier. Fishing kayaks have wider, more stable hulls, built-in rod holders or gear track systems, more mounting points, and flatter decks. A recreational kayak works, especially with aftermarket accessories, but you'll hit limitations faster.
Q: Do I need a license to kayak fish?
In almost every U.S. state, yes. Kayak fishing requires a standard fishing license for the state you're fishing in. Some states also require kayak/vessel registration. Check your state's fish and wildlife agency before your first trip.
Q: What's the most common beginner mistake?
Overbuying early. Buying a fish finder before you've figured out how to read water, buying expensive rods before you've learned to paddle efficiently and anchor, buying accessories for problems you haven't experienced yet. Get on the water. Identify your actual friction points. Then buy to solve those specific problems.
Q: What kind of fish can I catch from a kayak?
Almost anything. Kayak anglers target bass, crappie, bluegill, catfish, walleye, trout, pike, muskie, redfish, snook, flounder, and striped bass. The kayak gets you into shallow water, heavy cover, and small creeks that boats can't access — often where the fish actually are.
Q: Is kayak fishing safe?
Yes, with the right gear and common sense. Wear your PFD every time. Check weather before launching. Don't fish in conditions beyond your skill level. Tell someone where you're going and when you expect to be back.
You're More Ready Than You Think
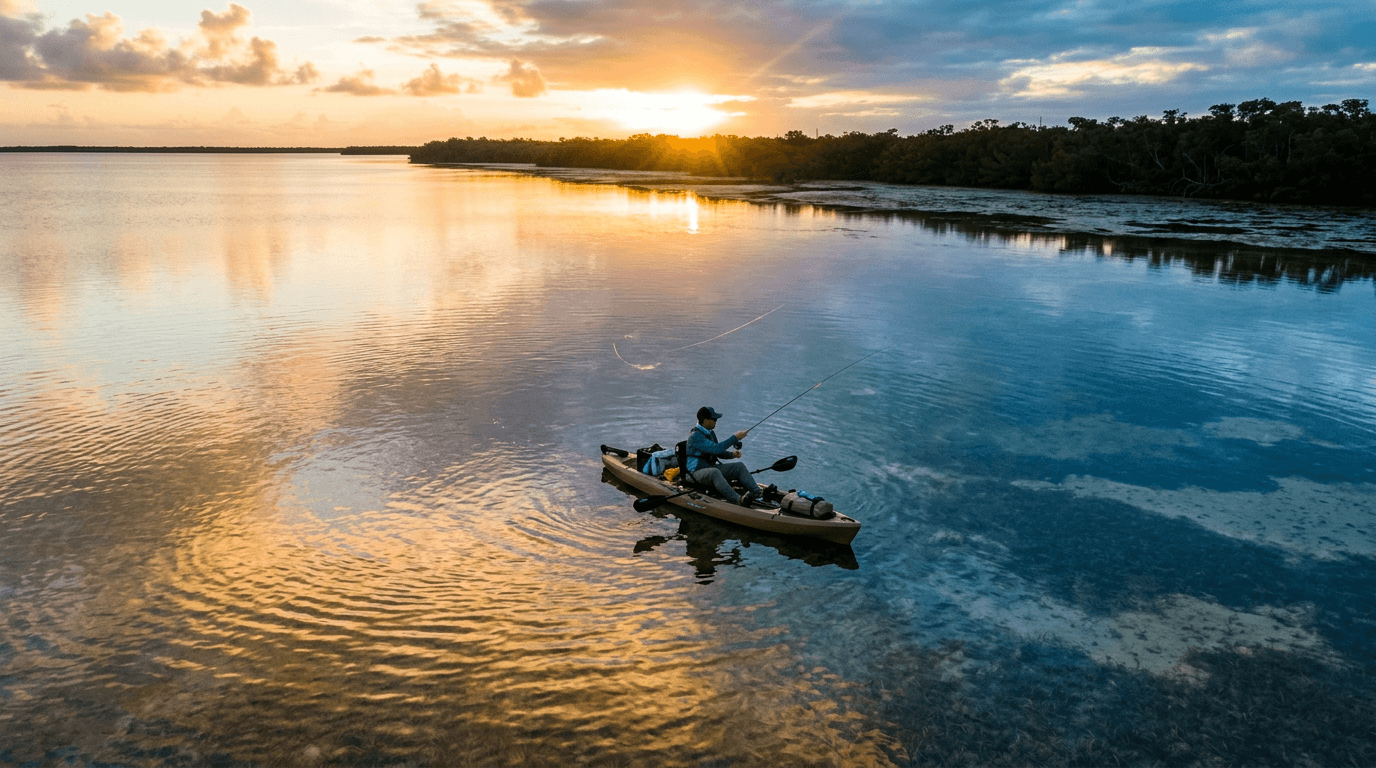
You don't need a $5,000 rig to catch fish from a kayak. Some of the best kayak anglers fish out of $400 recreational kayaks with a milk crate and two rod holders. The kayak gets you to the fish. The rest is refinement.
Start with the safety basics, add what makes you comfortable, and let your time on the water tell you what to add next. The setup will come together naturally as you fish more.
Now go get on the water.
Related Posts
How to Add a Trolling Motor to a Kayak: Complete Installation Guide
Learn how to add a trolling motor to a kayak step-by-step, including thrust sizing, mount types, wiring, battery selection, and state registration rules.
Inshore Kayak Fishing Tips for Beginners: 12 Things Nobody Tells You First
Inshore kayak fishing tips for beginners covering tides, tackle, conditions, and self-rescue so your first saltwater trip doesn't end in frustration.

DIY Fishing Kayak Setup: 7 Modifications That Cost Under $100 Total
Rig your fishing kayak with rod holders, anchor trolley, and fish finder for under $100. Step-by-step diy fishing kayak mods with specific products and prices.