Affiliate Disclosure:This article contains affiliate links. If you purchase through our links, we may earn a small commission at no extra cost to you. We only recommend gear we've tested or would genuinely use ourselves.
how to • May 15, 2026 • 16 min read · The Bite Intel Team
How to Add a Trolling Motor to a Kayak: Complete Installation Guide
Learn how to add a trolling motor to a kayak step-by-step, including thrust sizing, mount types, wiring, battery selection, and state registration rules.
You bought a fishing kayak to cover water, not to paddle yourself into exhaustion before the bite even starts. Adding a kayak fishing motor changes the game — you can hold position in current, cover creek flats efficiently, and still have arms left to fish by the time you reach your first spot.
Setting up a kayak with electric motor capability takes an afternoon and runs $250–$500 all-in for a solid, reliable rig. The problem is that most guides stop at "drill some holes and clamp on the motor." They skip the details that actually matter: sizing thrust correctly, waterproofing the wiring, balancing the battery weight, and avoiding the registration fine that catches first-timers off guard.
We've rigged several kayaks with kayaks trolling motors over the years — from a basic 18-lb thrust Newport Vessels setup on a 10-foot sit-on-top to a full bow-mounted Bixpy J-1 build on a longer platform. Here's everything we've learned, in order. For our tested motor picks, see our best trolling motor for kayak guide.
How Much Thrust Does a Kayak Trolling Motor Need?
Use this formula: divide your fully loaded kayak weight in pounds by 100 to get the minimum thrust in pounds. A 350-lb total setup (kayak + gear + you + battery) needs at least 3.5 lbs of thrust just to move in still water — and in current or wind, you want 2x that minimum. For most kayak anglers, 18–30 lbs of thrust covers everything from flat-water bass lakes to light river current.
Don't undersize. A motor constantly running at full throttle to keep up drains the battery in half the time and wears out faster. A 30-lb motor running at 40% throttle is more efficient — and quieter — than an 18-lb motor running at 80%.
| Product | Rating | Price | Best For | Link |
|---|---|---|---|---|
| Newport Vessels NK180S | 4.2/5 | ~$150 | Kayaks under 14 ft, calm lakes | Check Price |
| Minn Kota Endura C2 30 | 4.5/5 | ~$200 | Most fishing kayaks, light current | Check Price |
| Bixpy J-1 Motor | 4.7/5 | ~$900 | Premium kayak with electric motor — battery integrated, no mount needed | Check Price |
The Minn Kota Endura C2 30 is our standard recommendation for most anglers. Per Minn Kota's published specifications, a 30-lb thrust motor draws approximately 30 amps at full speed on a 12V system — that's 1 hour of full-throttle runtime on a 30Ah battery. At trolling speed (30–40% throttle, roughly 8–10 amps of draw), you're looking at 3–5 hours. A full day of fishing.
Bow Mount, Stern Mount, or Side Mount — Which Is Right for a Kayak?
For kayak fishing, bow mounting gives better boat control and is ideal for working structure; stern mounting is simpler to install and better for straight-line trolling.
Here's how the three positions actually perform on the water:
Bow mount: The motor pulls the boat rather than pushing it, so the kayak tracks exactly where the motor points. This gives you precise control when you're working dock edges, brush piles, or creek channels. Requires a longer shaft (36–42") and a bow-specific bracket. Downside: harder to reach the motor head while seated.
Stern mount: The simplest installation. The motor clamps to a transom bracket bolted to the rear of the kayak and pushes from behind. Slightly less precise steering, but perfectly adequate for flat-water lakes, ponds, and slow rivers. Best choice for beginners and anglers who mainly troll.
Side mount: Some sit-on-top kayaks with accessory rails (T-track or Arca-Swiss) can take a mid-ship side bracket. The motor sits within arm's reach and deploys without leaning over the bow or stern. YakAttack makes a TorqPedo Side Arm bracket specifically for this. Works best on wider kayaks (32"+ beam) that won't list under the motor's lateral torque.
Tip
What You Need Before You Start
For a standard stern transom mount setup, gather these materials before you touch the kayak:
Hardware:
- Trolling motor (18–30 lbs thrust, 12V)
- Transom mount bracket (or bow bracket if front-mounting)
- Stainless steel bolts (3/8" diameter) with nylon lock nuts
- Marine-grade silicone sealant (3M 4200 or equivalent)
Electrical:
- 12V deep-cycle battery — 30–50Ah capacity
- Waterproof inline blade fuse holder + fuse (match motor amp draw)
- Marine-grade 16-gauge wire, at least 6 feet
- Anderson SB50 connectors or equivalent waterproof connector set
- Self-amalgamating (self-fusing) tape — not regular electrical tape
Tools:
- Drill + 3/8" bit
- Painter's tape (prevents drill from skating on rounded plastic)
- Non-permanent marker for marking hole positions
- Basic hand tools: wrench, screwdriver, wire crimper
The hardware and electrical materials run $40–$80 total. Don't substitute hardware-store zinc or steel bolts — they corrode within one season in a wet environment. Stainless steel or marine-grade aluminum only.
How to Install a Trolling Motor Mount on a Kayak
A stern transom mount installs in 30–45 minutes using a drill and basic hand tools. Position the bracket so the motor shaft clears the hull by at least 2 inches at full deployment, and the propeller runs 6–8 inches below the waterline when underway.
Step 1: Choose your exact mount position. Sit in the kayak and reach back to where the motor tiller will be. You want to steer without twisting uncomfortably. Most anglers land 8–12 inches from the centerline, on their dominant hand side.
Step 2: Mark hole positions. Hold the bracket in position and trace the bolt holes with a marker. Double-check clearance — the motor shaft must swing freely to full deployment without hitting the hull.
Step 3: Apply tape before drilling. Place painter's tape over each marked hole. This prevents the drill bit from skating across rounded plastic and scratching the hull.
Step 4: Drill pilot holes. Use a 3/8" bit for standard transom brackets. Drill straight through the hull — don't angle the bit. Clean up any plastic burrs with a utility knife.
Step 5: Seal each hole. Squeeze a small bead of 3M 4200 marine sealant around each bolt before inserting it. Let it skin for 5 minutes. This is what keeps water from slowly migrating into the hull over seasons of use.
Step 6: Bolt the bracket down. Insert bolts from the outside, thread nylon lock nuts on the inside. Tighten until snug — not cranked. You're threading into plastic, not steel. Over-tightening cracks the hull.
Step 7: Mount the motor and set depth. Slide the motor shaft into the bracket, set shaft depth so the prop sits 6–8 inches below the waterline, and tighten the depth lock. Verify the shaft swings freely through its full rotation without contact.
Warning
How to Wire a Trolling Motor Battery Safely
Connect positive first, install an inline fuse within 12 inches of the battery's positive terminal, and wrap every connection in self-amalgamating tape. This is the step every DIY guide glosses over — and it's the one that causes fires, shorts, and fried motors when skipped.
Follow this exact sequence:
Step 1: Install the inline fuse on the positive run. The fuse holder lives within 12 inches of the battery's positive terminal, on the wire going to the motor. For a 30-lb motor (30 amp draw), use a 30-amp fuse. For an 18-lb motor (20 amp draw), use a 25-amp fuse.
Step 2: Run positive from fuse holder to battery positive. Use marine-grade 16-gauge wire. Crimp terminals onto wire ends rather than twisting and taping bare wire — crimped connections are more reliable and corrosion-resistant.
Step 3: Run negative directly from motor to battery negative. No fuse needed on the negative side.
Step 4: Install Anderson SB50 connectors in-line. These allow you to disconnect the motor in seconds, and the IP67 rating keeps moisture out of the connection even after a full dunking.
Step 5: Wrap every connection in self-amalgamating tape. Start 1 inch back from the connection point, wrap with 50% overlap, and extend 1 inch past. Unlike standard electrical tape, self-amalgamating tape fuses into solid rubber that won't unravel in water.
Step 6: Route wires cleanly. Keep runs short, away from footwells and any sharp edges that could abrade insulation over time. Secure with zip ties or adhesive cable clips.
According to the American Boat and Yacht Council (ABYC), all DC circuits on watercraft should be protected by a fuse or circuit breaker within 7 inches of the power source (up to 40 inches when wire is protected from physical damage). That standard applies to motorized kayaks.
Shop Marine Wiring Kit with Waterproof ConnectorsChoosing and Positioning the Battery
For most kayak trolling motor setups, a 12V 30Ah lithium iron phosphate (LiFePO4) battery is the best choice — it weighs about 8–9 lbs versus 20–25 lbs for a lead-acid equivalent, handles 2,000+ charge cycles versus 200–300 for AGM, and doesn't off-gas hydrogen in enclosed hull spaces.
Runtime math is simple: amp-hours ÷ amps drawn = hours of runtime. At low trolling speed (about 8 amps), a 30Ah battery gives you nearly 4 hours. At full throttle on a 30-lb motor (30 amps), you get 1 hour. Most anglers cruise at 20–40% throttle, which puts a full day of runtime within reach on a single charge.
Battery placement matters as much as battery choice. Place it:
- Centered side-to-side — off-center weight makes the kayak list and tracks poorly
- As low as possible — lower center of gravity means more stability
- Behind the seat, not at the bow — bow-heavy kayaks are hard to paddle if the motor dies mid-trip
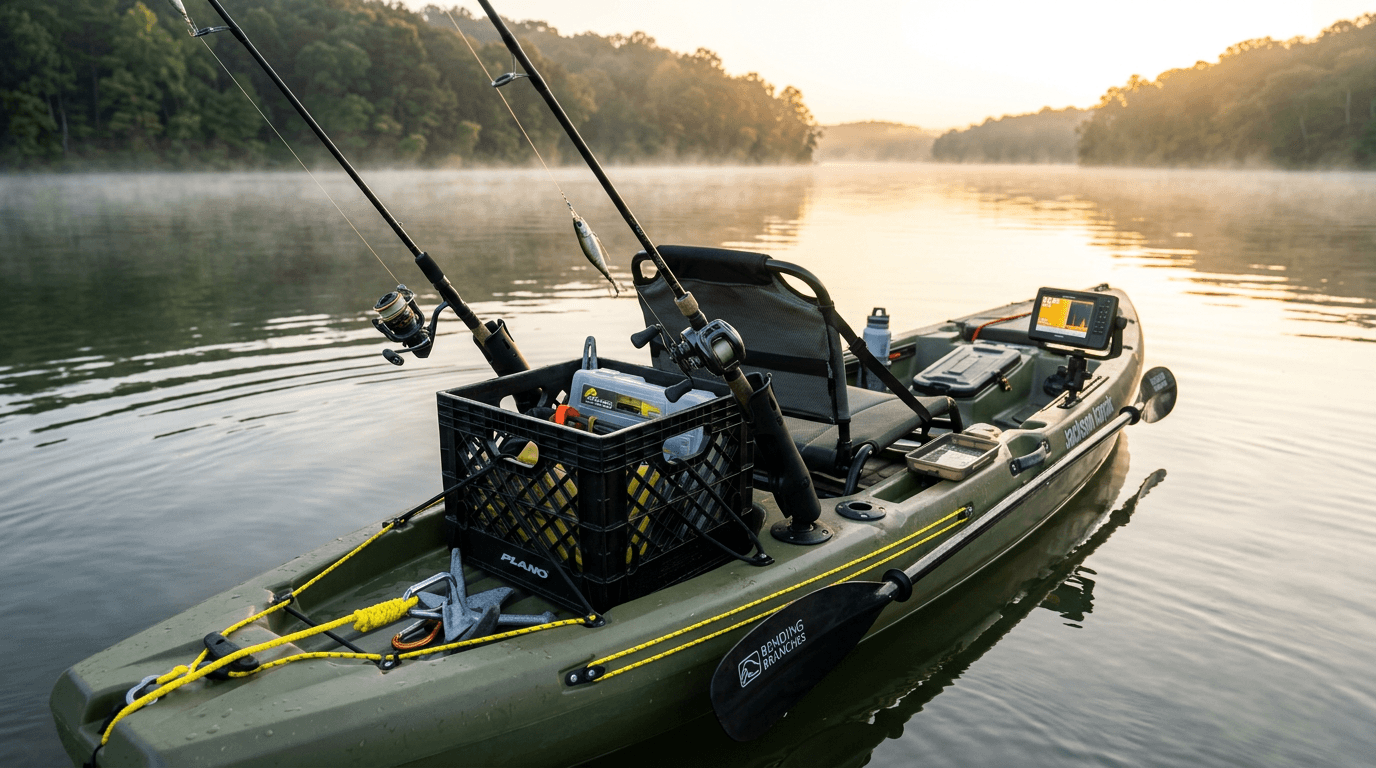
Many anglers use their kayak fishing crate as a base for the battery box — the crate's flat bottom prevents the box from sliding, and the setup keeps all your heavy gear consolidated in one spot.
Shop 12V LiFePO4 Trolling Motor Batteries Shop Waterproof Marine Battery BoxesDoes Adding a Trolling Motor Mean You Have to Register Your Kayak?
In most U.S. states, yes — any kayak with a motor attached must be registered as a motorized watercraft, regardless of motor size or whether it's electric or gas. This is the most overlooked aspect of kayaks with trolling motors, and it's the one that gets anglers fined.
States with confirmed motorized-kayak registration requirements include Florida, Texas, Minnesota, Missouri, Michigan, Wisconsin, and most others. A few states — including Wyoming and a handful of others — exempt kayaks under a certain length or with motors below a specific horsepower threshold, but those are exceptions, not the rule.
When registered, you'll typically need to:
- Display registration numbers on the bow
- Carry registration papers on the water
- Renew annually (most states charge $10–$50/year)
Warning
Some states also require a boating safety certificate once the kayak is motorized. Confirm through your state's Department of Natural Resources or Game Commission.
For a complete breakdown of legally and efficiently rigging your kayak, see our how to rig a kayak for fishing guide.
Frequently Asked Questions
Can I add a trolling motor to an inflatable kayak?
Yes, with caveats. Inflatable kayaks can handle small motors (18 lbs thrust or less) when the bracket mounts to a rigid stern section or purpose-built external mount — not clamped directly to inflated tubes. Use a bracket specifically rated for soft-sided boats, keep thrust small, and test stability near shore before fishing. At higher thrust, the motor torque can deform the stern and cause tracking problems.
What battery do I need for a trolling motor on a kayak?
For a 12V motor in the 18–30 lb thrust range, a 30Ah LiFePO4 battery is the practical sweet spot. It weighs under 9 lbs, delivers roughly 3–5 hours of real trolling time, and uses any standard 12V charger. If you're running all day or dealing with consistent current, step up to 50Ah. Avoid old-style lead-acid batteries unless weight genuinely isn't a concern — the weight penalty and shorter lifespan are hard to justify.
Will a trolling motor make my kayak unstable?
The motor itself won't. Improper battery placement will. Keep the battery centered and as low in the hull as possible. Before your first fishing trip, run a quick stability test near shore: sit in your normal fishing position with everything loaded, and see how the kayak handles side-to-side lean. If it feels twitchy, try repositioning the battery lower or adding kayak outriggers — especially important on kayaks under 28 inches wide.
How fast will a trolling motor push a kayak?
A 30-lb thrust motor will push most 12-foot fishing kayaks at 3–4 mph at full speed. That's enough to hold against light current and efficiently reposition between spots — but not enough to outrun a building storm or cover several miles quickly. Don't buy a trolling motor expecting boat speeds. Buy it for boat control and efficiency.
Do I need a special mount for bow mounting a trolling motor on a kayak?
Yes — bow mounts are different from transom mounts. They bolt to the deck or rail at the front of the kayak and use a longer motor shaft (36–42"). Jackson Kayak sells dedicated bow mount accessories for some of their fishing models. For most other kayaks, companies like YakAttack make universal bow mount brackets that work with Arca-Swiss and T-track rail systems.
If we were building one budget-smart trolling motor rig right now, it'd be a Minn Kota Endura C2 30 ($200) on a stern transom bracket ($40), powered by a 30Ah LiFePO4 battery (~$150) in a waterproof case. All-in under $430, adds under 15 lbs, and gives a full day of practical trolling time. Get the kayak registered before your first trip — and if you're still building out the rest of your fishing platform, our kayak fishing setup for beginners guide covers everything else you'll want on deck.
Related Posts

Inshore Kayak Fishing Tips for Beginners: 12 Things Nobody Tells You First
Inshore kayak fishing tips for beginners covering tides, tackle, conditions, and self-rescue so your first saltwater trip doesn't end in frustration.

DIY Fishing Kayak Setup: 7 Modifications That Cost Under $100 Total
Rig your fishing kayak with rod holders, anchor trolley, and fish finder for under $100. Step-by-step diy fishing kayak mods with specific products and prices.
Fishing Kayak Set Up: 9 Rigging Essentials (in the Order You Actually Need Them)
Complete fishing kayak set up guide with priority order, specific product names, and real prices. Budget setup ~$151, full rig ~$456.