Affiliate Disclosure:This article contains affiliate links. If you purchase through our links, we may earn a small commission at no extra cost to you. We only recommend gear we've tested or would genuinely use ourselves.
how to • May 14, 2026 • 11 min read · The Bite Intel Team
Fishing Kayak Set Up: 9 Rigging Essentials (in the Order You Actually Need Them)
Complete fishing kayak set up guide with priority order, specific product names, and real prices. Budget setup ~$151, full rig ~$456.
Every rigging guide lists equipment alphabetically or by category. That's useless when you have a $150 budget and need to know what to buy first.
This guide is ordered by priority — what you need before trip 1, what can wait until you know your water, and what most anglers skip until they regret it. We've rigged a lot of kayaks, and this is the sequence we'd tell a friend.
This post covers what to add to a kayak you already own, with a freshwater focus (bass, crappie, catfish). For step-by-step installation on each mod — rod holders, anchor trolley, fish finder wiring — see the companion post: DIY Fishing Kayak Setup.
1. PFD — Before You Leave the Driveway
A fishing kayak set up that's missing a worn PFD is a liability, not a rig.
The key word is worn. A life jacket stowed in the hatch doesn't count legally in most states, and it definitely doesn't count when you flip. Kayak capsizes are instantaneous — there's no time to dig through your gear.
For fishing, you want a Type III PFD with a low-profile front panel that doesn't block your casting stroke, plus zippered pockets for pliers, a dehooker, or a fishing license.
The standard on fishing kayaks is the Onyx A/M-24 (~$70). Four pockets, low-profile cut, U.S. Coast Guard Type III rated. It's what we see on 80% of rigs at the put-in.
Check Price — Onyx A/M-24 Fishing PFDWarning
A life jacket stored in your hatch is illegal in most states and useless if you flip. Capsizes happen in under two seconds. Wear it every time, every trip — no exceptions.
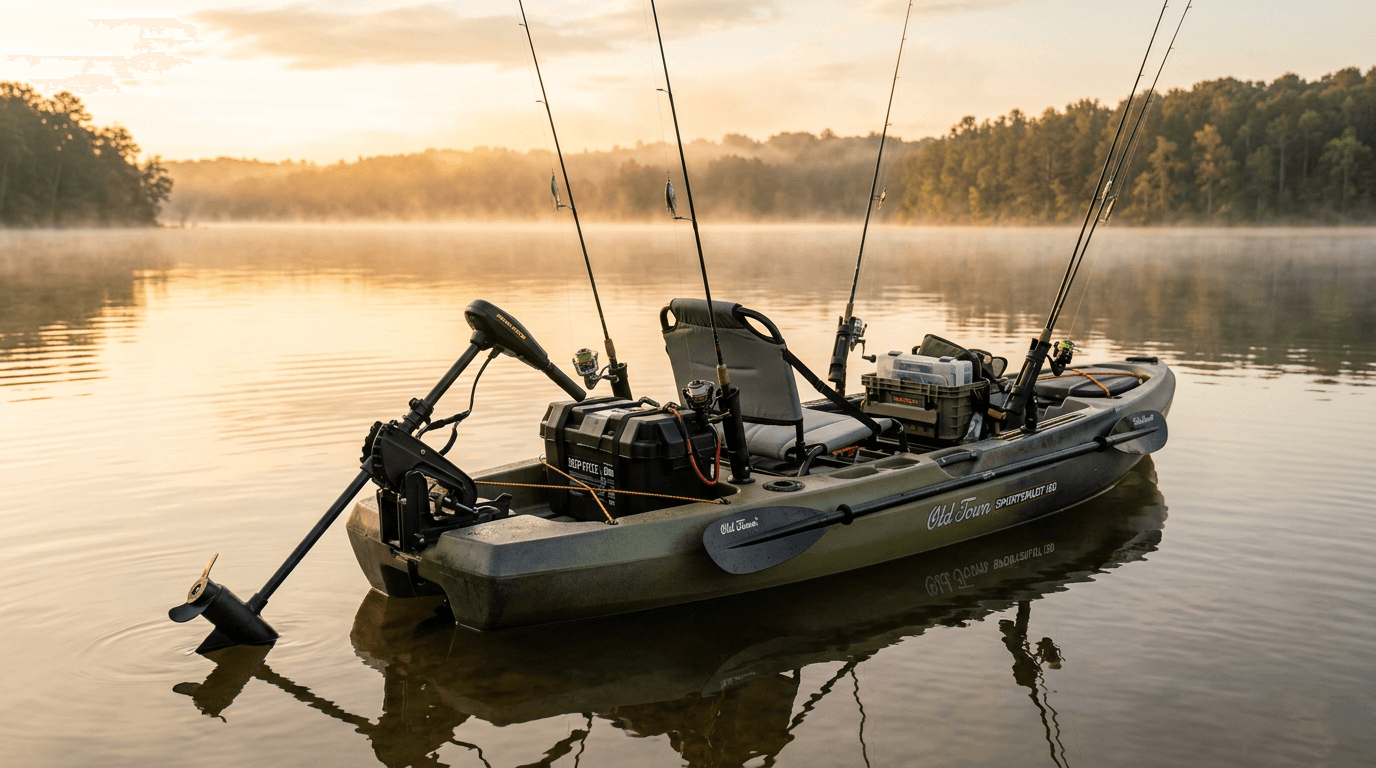
2. Rod Holders and Storage — Before Your First Fishing Trip
Without rod holders, you're either holding your rods while paddling or laying them across your lap where they slide overboard. We've seen both. Neither works.
Rod holders are the first fishing-specific mod because they make the kayak actually function as a fishing platform.
Three options at different price points:
- Gear track mount (no-drill, ~$28 each) — clamps to existing factory tracks on most fishing kayaks. Reposition without tools.
- DIY milk crate with PVC rod holder tubes (budget, ~$10 total) — zip-tied PVC pipe through a milk crate bungeed to the tank well. Functional, customizable, ugly in a good way.
- Flush-mount drill-in (permanent, ~$15–20 each) — cleanest look, most secure, requires drilling.
We cover the full install on all three in the companion post.
Tip
Keep nothing within 18 inches of your seat on either side — that's your paddle arc. Rod tips shatter on paddle strokes. Mount holders behind the seat or angled forward past the footpegs.
Full rod holder and milk crate installation guide
3. Anchor System — Before Any River, Current, or Wind Fishing
An anchor trolley is the mod most beginner kayak anglers skip, and it's the one most likely to get them hurt.
Here's why it comes before electronics: anchoring off a side grab handle or tank well handle creates a sideways load on your hull. In any current or wind, that pulls you broadside and flips the kayak. An anchor trolley — a paracord loop running bow to stern with a carabiner — keeps the anchor load aligned fore or aft regardless of where you tie off. Sideways load eliminated.
A pre-made kit saves an hour of rigging. The YakGear Deluxe Anchor Trolley Kit (~$30) includes the pulleys, line, and carabiner. Complete install runs about 20 minutes with a drill.
Check Price — YakGear Anchor Trolley KitWarning
Never anchor off a side handle, grab loop, or stern handle. In any current or crosswind, that creates a sideways load that can flip the kayak. Always route anchor load through the bow or stern using a trolley system.
For the DIY build with paracord and pulleys (under $9) and complete install photos, see the DIY Fishing Kayak Setup guide.
4. Fish Finder — Once You Know Your Water
This is not a day-one purchase. We mean that.
Spend your first season learning the water with your eyes — reading banks, working structure visually, building a mental map. On water you know well and fish under 12 feet deep, a fish finder adds almost nothing.
When a fish finder earns its cost:
- Deep structure: ledges, drop-offs, submerged humps in 15+ feet
- Crappie or catfish holding suspended in the water column
- Unfamiliar water where you're mapping depth and bottom type blind
When you can skip it: Shallow ponds and coves under 12 feet where you already know every dock and laydown. You're reading the bank, not the bottom.
For mounting, a scupper transducer mount drops into an existing scupper hole — zero hull drilling. Cable routing through the hull is covered in the DIY post.
The 5–7 inch screen is the right size. Larger screens catch wind and block your casting stroke. Go smaller and you're squinting.
| Product | Rating | Price | Best For | Link |
|---|---|---|---|---|
| Garmin Striker 4 | 4.6/5 | ~$130 | Budget freshwater — crisp 2D sonar, no GPS map | Check Price |
| Lowrance Hook Reveal 5 | 4.5/5 | ~$200 | Mid-range — CHIRP sonar plus built-in GPS mapping | Check Price |
| Humminbird Helix 5 | 4.7/5 | ~$280 | Best display clarity — down imaging included | Check Price |
Tip
If you're bass fishing shallow water you already know, skip the fish finder first season and put that $130 toward a better paddle or a second rod. Add the sonar when you start fishing new water or chasing crappie in deeper structure.
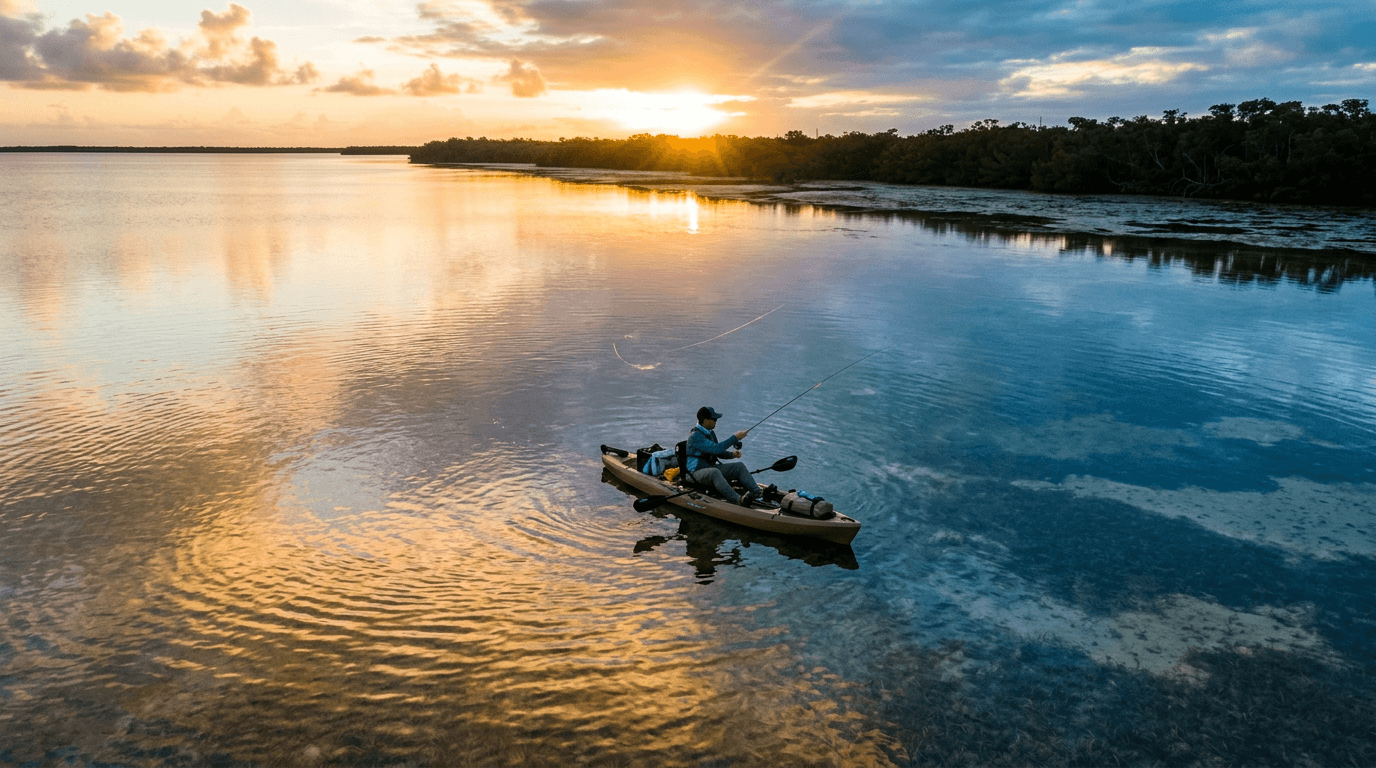
5. Fishing Paddle — The Upgrade Most Anglers Put Off
Factory paddles on budget kayaks weigh 35–40 oz and lack any fishing-specific features. After a full day on the water, that weight adds up — and you'll feel it in your shoulders.
A fishing paddle adds:
- Drip guards that channel water off the blade before it runs down the shaft into your lap
- Hook keeper notch on the shaft to secure your rod when paddling between spots
- Sub-30 oz weight that actually matters over 6 hours of paddling
Paddle length: A 28–32 inch wide kayak needs a 230cm paddle. A 33–36 inch wide kayak needs 240cm. When in doubt, go longer — a too-short paddle forces you to lean over the gunwales.
The benchmark at the entry-level price is the Bending Branches Angler Classic (~$90). Fiberglass shaft, 26 oz, drip guards, hook notch. It's the upgrade we recommend before any electronics purchase.
Check Price — Bending Branches Angler Classic6. Dry Storage — Protect What Matters
One splash in the wrong direction destroys a phone, kills your keys, swells your wallet. Soft plastic baits absorb water and fall apart. Drag mechanisms on spinning reels corrode faster than you'd expect after repeated splashing.
A 5L roll-top dry bag handles your phone, keys, and wallet for under $25. Roll-top only — zipper dry bags fail with repeated use. The roll closure is what creates the seal.
The Earth Pak 5L (~$20) has held up on everything we've run it through. Submersible rated, not just splash resistant.
Check Price — Earth Pak 5L Dry BagTip
Make it automatic: phone, keys, wallet go in the dry bag before you load the kayak — not after you're on the water. The trips you get lazy are the trips you drop your phone at the boat ramp.
7. Landing Net
If you're doing any catch-and-release — and most freshwater bass and crappie anglers are — a rubber mesh net is not optional. Nylon mesh shreds the slime coat that protects fish from disease and tears gill tissue. A fish you worked to land and released in good shape dies hours later because of a cheap nylon net.
Rubber mesh, always.
For kayak fishing, a folding-handle net fits flat in your crate until you need it. Fixed-handle nets deploy faster but are harder to store without a dedicated mount.
The Frabill Kwik Stow Folding Net (~$35) is the one we reach for — rubber mesh, folds flat, 21-inch hoop handles most bass and crappie without issue.
Check Price — Frabill Kwik Stow Folding Net8. Phone Mount and Navigation
A phone with offline maps covers 90% of freshwater navigation needs. Navionics and onX Maps both download lake maps for offline use — depth contours, launch ramps, structure markers. Either one loaded before you leave the driveway is better than any paper map.
For the mount, stick to RAM Mount or YakAttack — handlebar clamp to a side rail, rated waterproof (not just water-resistant). A $10 suction-cup phone holder on the deck is a phone in the lake.
If you fish coastal or inshore water, skip the phone mount and buy a VHF marine radio instead. Better range than a cell signal, and if you need to call the Coast Guard, a VHF does it properly.
Check Price — RAM Mount Quick-Grip Phone HolderWhat Your Complete Fishing Kayak Set Up Should Cost
| Item | Budget | Recommended |
|---|---|---|
| PFD | $40 (foam Type III) | $70 (Onyx A/M-24) |
| Rod holders (2×) | $8 (DIY PVC) | $56 (2× YakAttack Omega) |
| Anchor trolley | $9 (DIY paracord) | $30 (YakGear kit) |
| Fish finder | — (skip first season) | $130 (Garmin Striker 4) |
| Paddle | $50 (factory) | $90 (Bending Branches) |
| Dry bag | $12 | $20 (Earth Pak) |
| Landing net | $20 | $35 (Frabill) |
| Phone mount | $12 | $25 (RAM Mount) |
| Total | ~$151 | ~$456 (with fish finder) |
| Total (no fish finder) | ~$151 | ~$326 |
For context: factory pre-rigged fishing kayaks charge $400–600 more than a bare equivalent kayak for the same gear in fixed positions. You're paying for convenience — and the rod holders end up where their engineers thought they should go, not where you actually need them.
Start with the PFD and rod holders. Those two cover safety and function for trip 1. Add the anchor system before you fish any current or wind-exposed water. Everything else builds trip by trip as you learn what you actually fish and how you fish it.
Frequently Asked Questions
What do I need to set up a fishing kayak for the first time?
Three things before trip 1: a Type III PFD worn on your body (not stored in the hatch), rod holders so you can paddle without holding your rods, and a basic storage crate for tackle. That's your minimum functional rig. Anchor system, fish finder, and paddle upgrade can all come later once you know your water.
How much does it cost to fully rig a fishing kayak?
A complete working setup runs about $150 budget (DIY rod holders, basic PFD, no fish finder) to $325–450 mid-range with a Garmin Striker 4 fish finder and Bending Branches paddle. Factory pre-rigged kayaks charge $400–600 more than a bare equivalent kayak for the same hardware in fixed positions — you're paying for convenience, not better gear.
Is a fish finder worth it for bass fishing on a kayak?
On shallow, familiar water under 12 feet — no. You're reading the bank and sight-fishing structure you already know. On deep structure, ledges, or unfamiliar water — yes. Even a $130 Garmin Striker 4 marks productive depth changes faster than blind casting drop-offs.
What's the difference between a fishing kayak and a regular kayak rigged for fishing?
Mostly the factory-installed features. A $600 recreational kayak with $150 in rod holders, an anchor trolley, and a storage crate fishes as well as a $1,400 factory fishing kayak. The "fishing" designation means flush mounts and molded-in storage came with the boat — same function, fixed positions, premium price.
For step-by-step installation instructions on every mod in this guide — rod holders, anchor trolley, fish finder wiring — see our DIY Fishing Kayak Setup guide.
Related Posts
How to Add a Trolling Motor to a Kayak: Complete Installation Guide
Learn how to add a trolling motor to a kayak step-by-step, including thrust sizing, mount types, wiring, battery selection, and state registration rules.
Inshore Kayak Fishing Tips for Beginners: 12 Things Nobody Tells You First
Inshore kayak fishing tips for beginners covering tides, tackle, conditions, and self-rescue so your first saltwater trip doesn't end in frustration.

DIY Fishing Kayak Setup: 7 Modifications That Cost Under $100 Total
Rig your fishing kayak with rod holders, anchor trolley, and fish finder for under $100. Step-by-step diy fishing kayak mods with specific products and prices.